Sprockets determine a motorcycle’s speed, acceleration, and overall performance. These toothed wheels may look simple to make; however, it’s not that easy – they must not only be made from strong raw materials but also with precision techniques so they can bear tons of engine force.
So, by carefully following a series of steps, manufacturers produce high-quality sprockets that ensure smooth and efficient power transfer, enhancing the riding experience for motorcycle enthusiasts worldwide. In this writing, we will explain the whole procedure involved in manufacturing motorcycle sprockets. So, read on!
Sprockets are manufactured from one of the 2-basic materials;
When it comes to Carbon steel, it is very strong and can be machined easily, but its demerits include its heavy weight and its vulnerability against corrosion ( steel is made out of iron ). On the other hand, Aluminium is way more lightweight but not as sturdy as carbon steel.
So, if you are looking for strength, carbon steel sprockets are the best choice, but if you are looking for something lightweight and average strength, aluminum sprockets are for you.
It is important to note that sprocket raw materials are not in the form of crushed particles, but carbon steel & aluminum come as a blank sheet from which sprockets are cut and processed later.
Every motorcycle has a different engine capacity, frame size, length, width, and height, so the components fitted in them are also different, including sprockets. Precision designs are required for each motorcycle, and using those design artists & engineers make custom tooth number, shape, and size sprockets for each bike – that will seamlessly integrate with that motorcycle’s transmission and drive system.
If the sprockets are not designed correctly, they will never fit on the bike engine or chain, and even if they fit, they will break in an instant due to rotational imbalance.

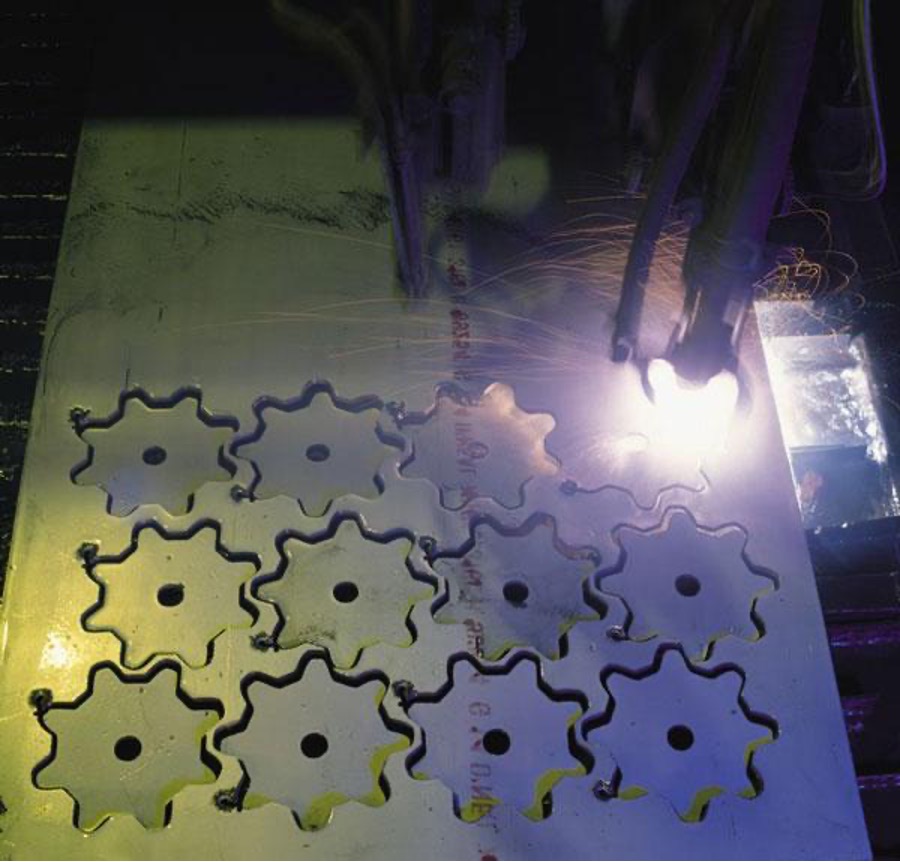
The following phase involves transforming the prepared sheet into the required sprocket shape. This transformation begins by cutting the chosen material sheet into appropriately sized blanks, a process facilitated by specialized cutting machines. Typically, these blanks take on a circular or disc-shaped form, possessing a diameter slightly larger than the final size of the sprocket. This allowance for extra diameter ensures sufficient material to shape and refine the sprocket’s intricate features during the subsequent manufacturing steps.
In this critical phase, precise techniques are utilized to shape the sprocket according to its intended design. This stage entails a combination of pressing and punching operations, strategically applied to eliminate excess material and create specific features on the sprocket.
The circular blanks are secured in place on specialized machinery. These machines have custom-designed tooling with specific shapes for punching. The setup ensures accurate alignment for consistent results.
“Punching uses precisely shaped tools that forcefully press down on the blank. These tools are designed to remove sections of material according to the sprocket’s design requirements.”
Common punching operations include creating kidney-shaped holes or forming the central mounting hole for the sprocket.
Pressing involves using mechanical force to shape the sprocket’s features. This step is essential for sprockets with complex designs or specific curves. The blanks are positioned between shaping tools that apply pressure to mold the metal into the desired shape.
Once the pressing and punching steps are completed, the motorcycle sprocket manufacturing process proceeds to machine teeth and holes. This phase involves specialized procedures to refine the sprocket’s key features, ensuring it’s ready for installation and optimal performance.

The hobbing machine selection depends on the sprocket’s specific tooth count. Different sprockets may require varying tooth profiles and counts to suit their intended purposes and the mechanical dynamics of the motorcycle. In this process;
In this process, the rotating speed of the mount and cutting speed determines the number of teeth, while the hob & mount distance tell the shape and depth of each tooth on the sprocket. So, the speed and distance are controlled very carefully for each sprocket to get the desired dimensions.
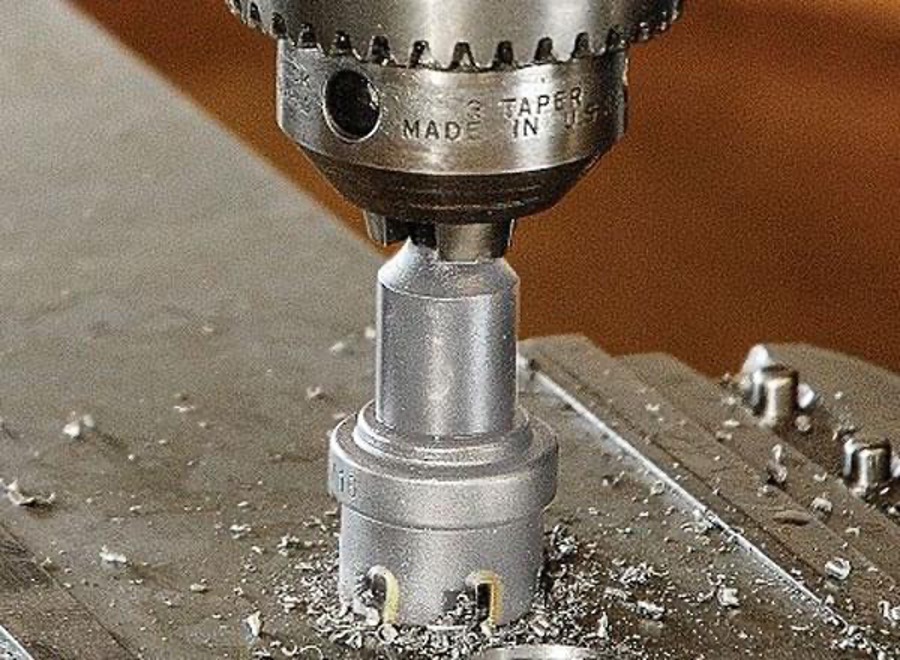
Now, it’s time to make holes in the sprocket, which will later attach it to the motorcycle engine. Each motorcycle has specific attachment points, so these attachment holes are drilled accordingly.
The precise location, width, depth, and shape of these holes are necessary because even a slight misalignment during fitting will cause the sprocket to lose balance, probably breaking the sprocket away from the engine. So that’s why a highly precise Vertical Machining Center (VMC) drilling process does this whole process.
Surface finishing is a critical phase in motorcycle sprocket manufacturing that focuses on enhancing aesthetics, reducing friction, and protecting against corrosion. Here’s a detailed overview of the surface finishing process;
During the making of sprockets, a lot of dirt, debris, oil, metal particles, and other stuff will likely have attached itself to it. So, the sprocket will have an uneven and unbalanced surface if we do the painting without cleaning it. Plus, the protective coating will be too weak and break away easily, giving a lot of vulnerability to rust.
Hence, before final finishing, the sprockets are washed, dried, and degreased to make their surface clean as much as possible.
After cleaning the sprockets, the uneven/sharp edges, burrs, and all the rough surfaces will be appeared. Manual/electrochemical deburring processes are then used to remove every fault from the surfaces – this improves the sprocket’s visual appeal and prevents potential safety hazards and premature wear.
Lastly, in cleaning, very minute particles are blasted at high speed onto the sprocket surface from all sides of the container – a process called Shot Blasting. This blasting process is used in every industry to eliminate microscopic-level rust, uneven surfaces, debris, and other imperfections. Shot blasting also causes microscopic dents on the surface, increasing the surface area while keeping the surface smooth – more surface area means better coating.
When it comes to coating, there are different processes, each with its criteria, final finish quality, and price tag, such as;
i) Painting: We all know what painting is – a process in which a liquid paint is sprayed onto a surface, usually by a manual operator or sometimes with robots. Painting is the cheapest but also the weakest coating option.
ii) Powder coating is a next-level coating process rather than a simple painting. In this process, the sprockets are given a charge, and the dry powder paint is given an opposite charge, so when the dry powder is sprayed on the sprockets, it gets attached to them. After that, the sprockets are put in a UV/heat oven, where this powder gets cured. Powder coating is very strong as compared to simple painting.
iii) Electroplating is similar to powder coating; the sprockets and paint are given opposite charges for better attachment, like in powder coating. However, in Electroplating, the sprockets are dipped in the paint-electrolyte solution, so it’s a wet process, while powder coating is a dry process. Moreover, electroplating gives more friction, abrasion, corrosion, and wear resistance. Above all, electroplating achieves the same results as powder coating but with thin layers, reducing overall weight and size.
Sprockets are very precise components because they have to go through a lot of friction with the chain at very high rotational speed – so they must have very durable surface and rotational balance. After their production, all the sprockets go through a series of the following inspections;
a) Eye-level Inspection: In this step, persons check the sprocket’s surface & color with only their eyes and hands. And even the slightest defect sprockets are picked out and sent to the factory for re-manufacturing.
b) Size and shape computerized checking: In this second test, a highly precise laser camera checks each part size, like its teeth, holes, etc. These laser cameras are very precise and check for defects in millimeters.
c) Coating Strength Tests: In order to check the paint, some sprockets from a batch are taken out, and their coating layers are chipped out to record their breaking point. If the breaking point exceeds the standard, the paint’s durability is okay, and the rest of the sprockets are passed for further inspection.
d) Working Functional Testing: To check the balance and aerodynamics of the sprockets, they are placed on a test mount and run at high speed to ensure they work properly.
e) Corrosion-Resistance Checking: Lastly, some of the sprockets from a batch are taken out and go through a series of salt and humidity tests to make them rust. Then, their corroding point is noted, and if this point is higher than the standard, it means the corrosion coating is doing its work well.
Following a successful inspection, the sprockets are carefully packaged to prevent damage during transportation and storage. Proper packaging helps maintain the integrity of the surface finish.
Join our mailing list to be the first one to know more new parts release and marketing info. Stay informed!


We will contact you within 1 working day, please pay attention to the email “wholesale@mpm-motorsports.com”
Comments